
Do you need to regularly move files from an FTP server and save them somewhere else? Maybe because you need the files as soon as possible or because the files are being moved away after some time? Then it’s time to automate this!
In this tutorial, I will show you how to automatically transfer files from an FTP server to your Google drive.
All you need is three things.
- FTP Credentials
- Google Drive Account
- Make.com
0. Define Workflow
Before we start building out the workflow, we need to break down the process into substeps which we will rebuild in make.
In this tutorial,
- Check for new files
- For each new file, create a separate run
- Download the file
- Upload the file to Google Drive
- If successfully uploaded file to Google Drive, delete on FTP Server
1. Navigate to Make.com
First thing is to open a browser of your choice (I use Google Chrome) and navigate to make.com. Login by clicking on the Login Button on the top right.
If you don’t have an account, yet, you can create one for free.
2. Create a new scenario and outline workflow
After successfully logging in, we can create the workflow by clicking Create a new scenario on the top right.
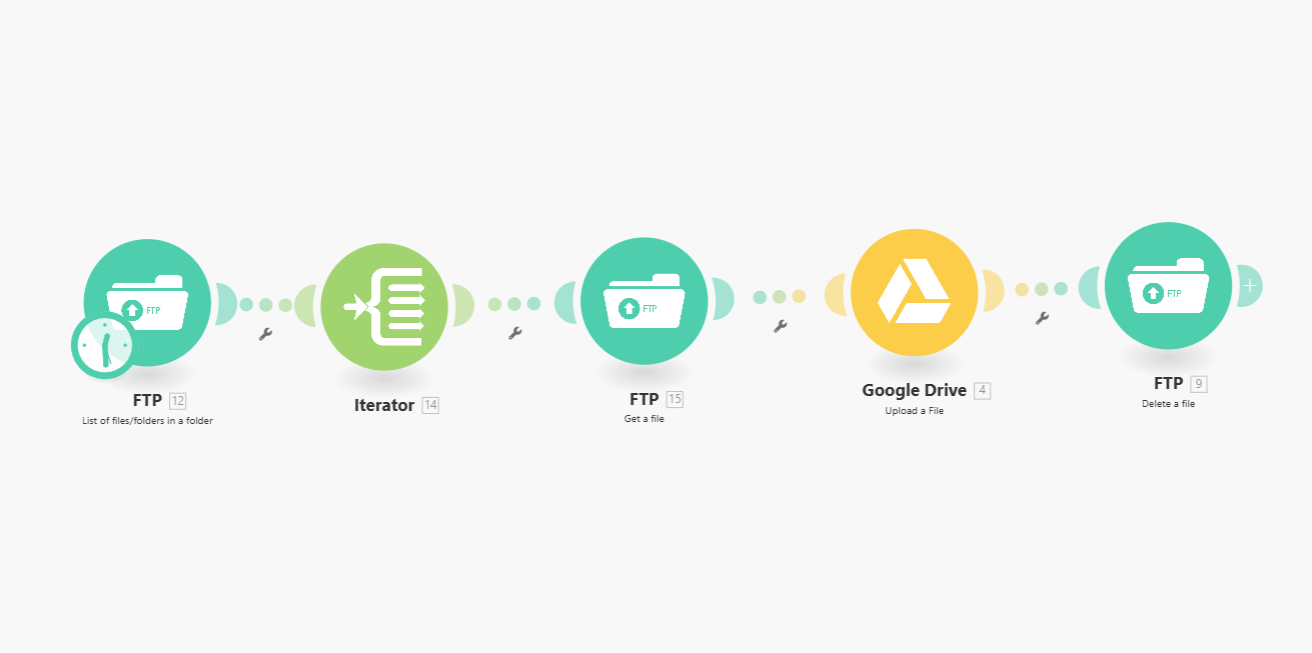
Overall, we are going to need five sequential steps as defined before (0.Define Workflow). This means that the next step will only be triggered if the preceding step has been successful. For example, step 2 will only be triggered after step 1 has been successful, step 3 will only trigger if step 2 has been successful, and so on.
List files on an FTP Server
First, we will be looking for new files on the FTP server. In order to do so, we are going to click on the + and search for FTP. In this dropdown, we need to select List of files/folders in a folder.
For now, close the popup window as we will configure the steps later.
After connecting to the FTP server and looking for specific files, we will get two kind of results. Either a yes, there is one or more files or no, there’s no file.
If there’s no files, the workflow is going to stop here and not trigger the following steps.
If there’s one or more files, it will continue the workflow.
Create parallel runs for each found file with the Iterator
As there might be multiple files, we need to set up an Iterator step next. For this, click on the small + button on the right of the first FTP step, search for Iterator and select the Iterator module. This iterator will trigger the following steps in parallel, depending on the amount of files that were found.
If there’s one file, the steps 3,4,5 will run once.
If there are two files, the steps 3,4,5 will run twice. Once for each file.
Download the file from the FTP server
In case a file has been found, it needs to be downloaded next.
In order to do so, we will add another step by clicking on the + and search for the FTP module again.
This time, we will select “Get a file” and continue with the next step.
Upload the file to your Google Drive
After successfully downloading the file, it needs to be uploaded onto our Google Drive. So, now our next module will be Google Drive and the action “Upload a File“.
Delete the file from the FTP server
Last but not least, if uploading the file was successful, we are going to delete the source file from the FTP. This will prevent future runs to upload the same files again.
Info: It would be possible to also move the file to another folder like “archive” or even have a separate list of files that is being updated with the processed files. But both of these options would be more complicated than this use case.
We add the last step of the workflow by searching again for the FTP module and selecting the “Delete a file” action.
3. Configure Workflow
Now, that we have finished building the overall structure of our workflow, we are going to configure it in the next steps.
Adjust Scheduling
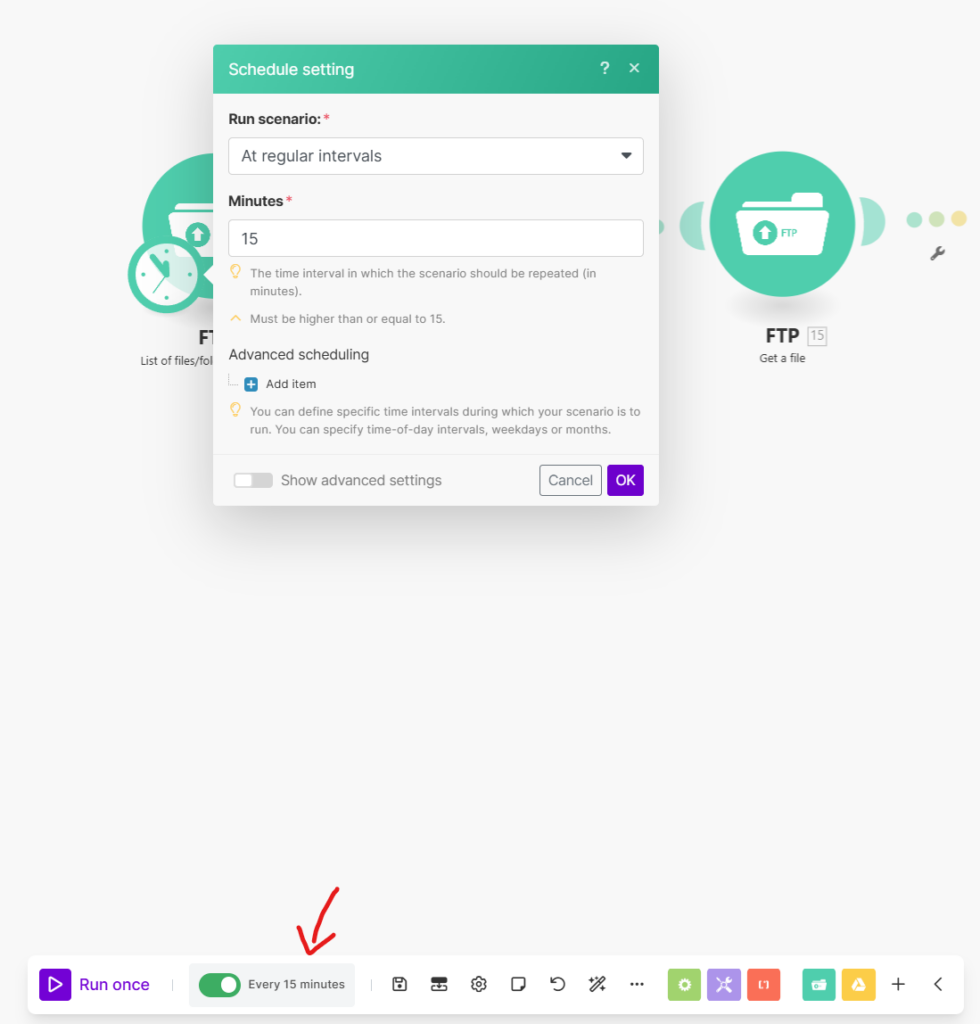
First, we will adjust the scheduling of the workflow.
How often do you want your workflow to execute and look for new files? In this example, I take 15 minutes as a regular interval.
If you want to change the interval, you can click on the scheduling menu on the bottom left of your screen where it says “Every 15 Minutes” and adjust the scheduling accordingly.
FTP – List of files/folders in a folder
Next, we want to connect to our FTP server to search for files.
Click on the first action of your workflow: List of files/folders in a folder.
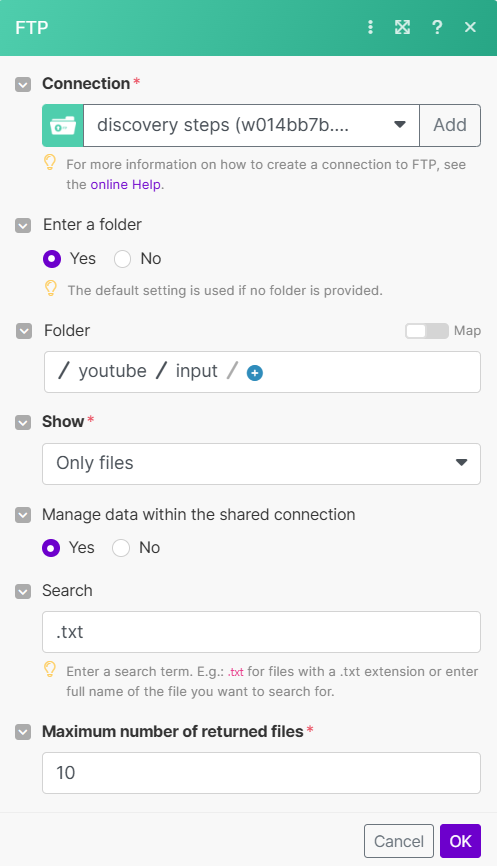
Then select the connection to your FTP Server. If you don’t have a connection set up yet, click on Add to set up a new connection.
Hint: You will need your FTP credentials like Host, Port, username and password.
After that, you can simply copy the settings you see in the screenshot and adjust accordingly:
Enter a folder: yes
Folder: select your folder path where your source files will be stored.
Show: Only files as we will only be looking for files and not for folders.
Manage Data within the shared connection: yes
Search: enter the filetype of the source files. In this example, I will only use .txt files. If you have csv files, enter .csv, and so on.
Maximum number of returned files: Is the amount of files you want to handle within each workflow run. Adjust accordingly to your expected amount of files.
Click on OK to save and continue with the next step
Iterator
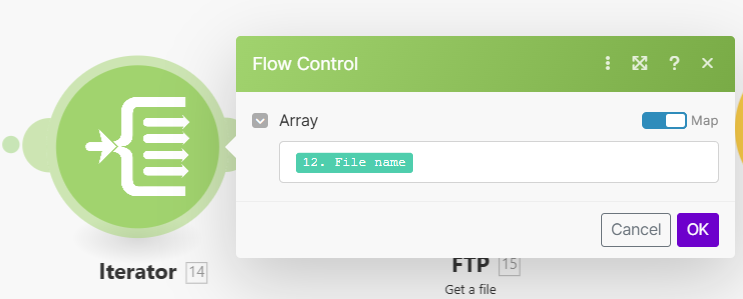
As described before, the iterator will take care of handling every single file found in the first step.
In order to start the following sequence in parallel, we need to define the actual parameter that the iterator is going to refer to. In this case, it is going to be the file name. This file name will also be the reference for the upcoming steps.
Click on the Iterator step and click into the empty field below the Array. Select File name from the list and click OK to save.
FTP – Get a file
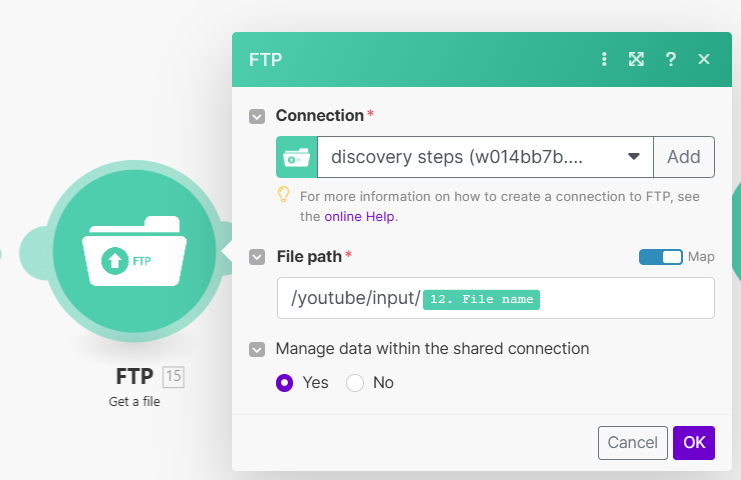
Now, we continue with actually downloading the file from the FTP.
Click on the Get a file action and select your ftp connection.
Make sure to use the same file path as defined before in “List of files/folders in a folder”.
However, this time, the action requires not only the file path but also the actual file name we want to download. This is also where our parameter/variable comes into play.
After putting in your file path, click on the field and select File name again. This will ensure that only the file we are looking for will be downloaded.
Click OK to save.
Google Drive – Upload a File
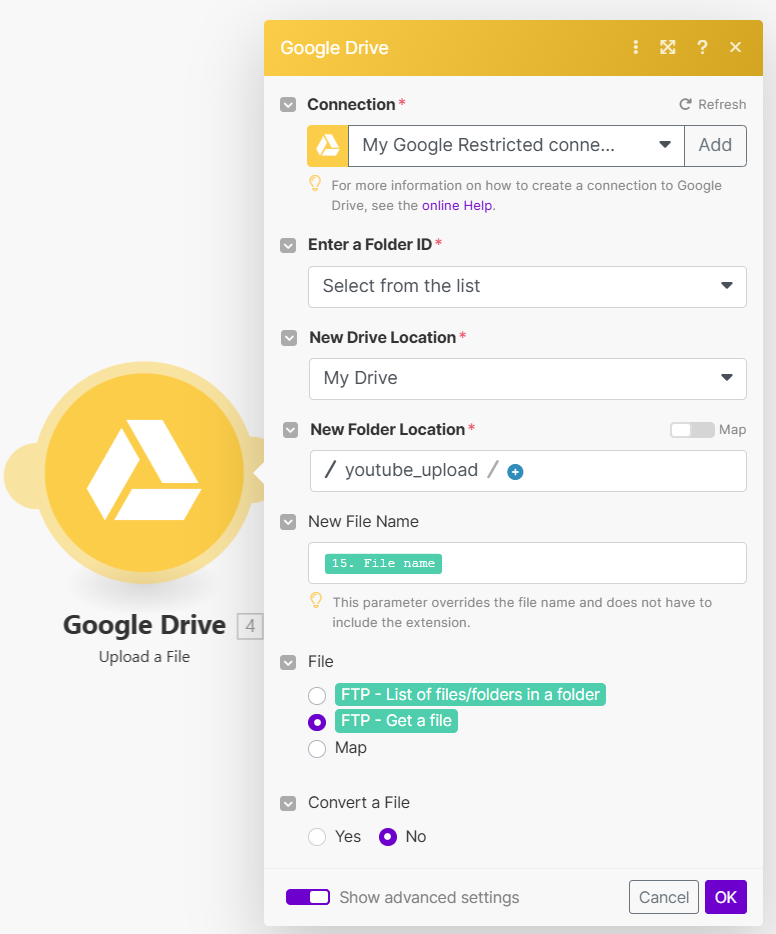
After successfully downloading the file, we then can upload the file to our Google Drive.
Click on the Google Drive action and select your Google Drive connection. If you haven’t set up your connection, yet, click on Add in order to create a new connection.
Then, we are going to select a folder from the list and define our Drive location. If you have renamed your Google Drive, select the drive you want to save the files in.In this example, I have the default drive location “My Drive”.
In New Folder Location we are going to define the target location of the folder.
In New File Name you can chose to define the new name for the file. In this example, we are not changing the file name. Instead, we will use the same variable File Name as before.
Also, we need to define which file to upload. Make sure to check “FTP – Get a file” to upload the actual file that has been downloaded before.
Hint: If you use “FTP – List of files/folders in a folder” you will only have an array of meta file information like the name. But not the files themselves.
Click on OK and continue with the last step.
FTP – Delete a file

Last but not least, we need to delete the source file from the FTP server to prevent the files to be processed multiple times.
Click on the FTP – Delete a file action and select your connection.
Use the same Folder as defined in the previous steps.
And the last step is to put in the File Name of the file that needs to be deleted.
That’s it. Click OK and we’re ready to test.